EasyWebMap
Live web map for Hytale servers. View your world in a browser with real-time player tracking, direction arrows, and click-to-locate. Embed on your website with iframe or build custom tools with the REST API. Uses Hytale's native map rendering.
About EasyWebMap
EasyWebMap
Built for the European Hytale survival server at play.hyfyve.net
A live web map for your Hytale server. View your world in a browser, track players in real-time, and easily integrate with your community website.
Quick Start
Download the latest EasyWebMap.jar from Releases
Put it in your server's mods folder
Restart your server
Open http://localhost:8080 in your browser
What You Can Do
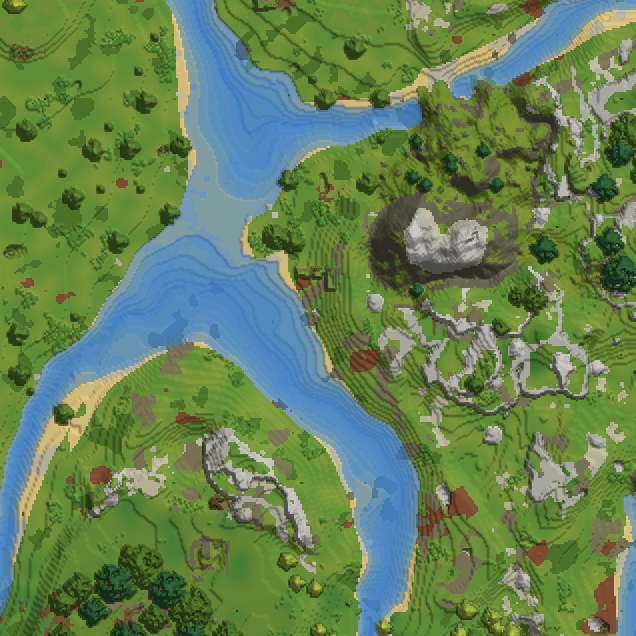
Live World Map
See your entire world rendered in a web browser
Terrain updates automatically as players build or destroy blocks
Zoom in/out and pan around freely
Uses Hytale's native map rendering (same as the in-game map)
Real-Time Player Tracking
See all online players on the map with arrow markers
Arrows rotate to show which direction players are facing
Click any player in the sidebar to jump to their location
Player positions update every second via WebSocket
Website Integration
Embed the map directly on your community website using an iframe:
<iframe src="http://your-server-ip:8080" width="100%" height="600"></iframe> Or link to it from your server's website, Discord, or forums.
REST API
Build custom tools using the built-in API:
Endpoint Returns
GET /api/worlds List of available worlds
GET /api/players/{world} All players in a world (name, position, direction)
GET /api/tiles/{world}/{z}/{x}/{y}.png Map tile image
WS /ws Real-time player position updates
Example: Fetch player positions
const response = await fetch('http://your-server:8080/api/players/world'); const players = await response.json(); // [{ name: "Steve", x: 100, y: 64, z: -200, yaw: 1.57 }, ...] Example: WebSocket for live updates
const ws = new WebSocket('ws://your-server:8080/ws'); ws.onmessage = (e) => { const data = JSON.parse(e.data); console.log(data.worlds); // All player positions by world }; Multi-World Support
Switch between worlds using the dropdown
Configure which worlds are visible
Each world has its own tile cache
Commands
Command What it does
/easywebmap status Show connection count, cache info, SSL status, and server status
/easywebmap reload Reload the config file
/easywebmap clearcache Clear all caches (memory + disk)
/easywebmap pregenerate <radius> Pre-generate tiles around your position
/easywebmap renewssl Force immediate SSL certificate renewal
All commands require the easywebmap.admin permission.
HTTPS with Let's Encrypt (Free SSL)
EasyWebMap can automatically obtain and renew SSL certificates from Let's Encrypt. No manual certificate management required!
Quick Setup
Point your domain to your server - Make sure map.yourserver.com (or whatever domain you choose) points to your server's IP address.
Open port 80 - Let's Encrypt needs to verify you own the domain by connecting to port 80. Make sure your firewall allows this.
Add to your config.json:
{ "enableHttps": true, "httpsPort": 8443, "domain": "map.yourserver.com", "acmeEmail": "admin@yourserver.com" }
Restart your server - The plugin will automatically: Register with Let's Encrypt
Request a certificate for your domain
Start serving HTTPS on port 8443
That's it! Your map is now available at https://map.yourserver.com:8443
How It Works
When you enable HTTPS, the plugin:
Creates an account with Let's Encrypt (stored in ssl/account.key)
Requests a certificate for your domain
Responds to Let's Encrypt's HTTP-01 challenge on port 80
Stores the certificate in ssl/domain.crt and key in ssl/domain.key
Starts the HTTPS server
Checks daily if the certificate needs renewal (renews 30 days before expiry)
Automatically reloads the certificate without restarting
HTTPS Configuration Options
Setting Default What it does
enableHttps false Enable/disable HTTPS
httpsPort 8443 Port for HTTPS (use 443 if you have permission)
domain "" Your domain name (required for HTTPS)
acmeEmail "" Email for Let's Encrypt notifications (optional but recommended)
useProductionAcme true Set to false for testing (uses staging server, avoids rate limits)
SSL Commands
Command What it does
/easywebmap status Shows HTTPS status, domain, and certificate expiry date
/easywebmap renewssl Force immediate certificate renewal
Requirements
Domain name - You need a domain pointing to your server (IP addresses won't work with Let's Encrypt)
Port 80 accessible - Let's Encrypt validates domain ownership via HTTP on port 80
Port 8443 (or 443) accessible - For serving HTTPS traffic
Testing First
Before going live, test with Let's Encrypt staging server to avoid rate limits:
{ "enableHttps": true, "domain": "map.yourserver.com", "useProductionAcme": false } The staging server issues test certificates that browsers won't trust, but it proves everything works. Once verified, set useProductionAcme back to true and restart.
Using Port 443 (Standard HTTPS)
By default, HTTPS runs on port 8443. If you want to use the standard HTTPS port (443):
{ "httpsPort": 443 } Note: Binding to port 443 may require running the server as root/administrator, or using a reverse proxy.
Behind a Reverse Proxy
If you're using nginx or Apache as a reverse proxy, you can let the proxy handle SSL and keep EasyWebMap on HTTP only. Example nginx config:
server { listen 443 ssl; server_name map.yourserver.com;
ssl_certificate /etc/letsencrypt/live/map.yourserver.com/fullchain.pem; ssl_certificate_key /etc/letsencrypt/live/map.yourserver.com/privkey.pem;
location / { proxy_pass http://localhost:8080; proxy_http_version 1.1; proxy_set_header Upgrade $http_upgrade; proxy_set_header Connection "upgrade"; proxy_set_header Host $host; } }
Configuration
Config file: mods/cryptobench_EasyWebMap/config.json
{ "httpPort": 8080, "updateIntervalMs": 1000, "tileCacheSize": 20000, "enabledWorlds": [], "tileSize": 256, "maxZoom": 4, "renderExploredChunksOnly": true, "chunkIndexCacheMs": 30000, "useDiskCache": true, "tileRefreshRadius": 5, "tileRefreshIntervalMs": 60000, "enableHttps": false, "httpsPort": 8443, "domain": "", "acmeEmail": "", "useProductionAcme": true }
Setting Default What it does
httpPort 8080 Web server port
updateIntervalMs 1000 Player update frequency (ms)
tileCacheSize 20000 Max tiles to cache in memory (~200MB at 10KB/tile)
enabledWorlds [] World whitelist (empty = all)
renderExploredChunksOnly true Only render chunks that players have explored (prevents lag/abuse)
chunkIndexCacheMs 30000 How long to cache the explored chunks index (ms)
useDiskCache true Save tiles to disk for persistence across restarts
tileRefreshRadius 5 Player must be within N chunks for tile to refresh
tileRefreshIntervalMs 60000 Minimum time between tile refreshes (ms)
enableHttps false Enable automatic HTTPS with Let's Encrypt
httpsPort 8443 Port for HTTPS connections
domain "" Your domain name for SSL certificate
acmeEmail "" Email for Let's Encrypt notifications
useProductionAcme true Use production Let's Encrypt (false = staging for testing)
Chunk Index Cache (chunkIndexCacheMs)
When renderExploredChunksOnly is enabled, the plugin needs to check which chunks have been explored. This requires reading an index from disk. To avoid reading disk on every tile request, the index is cached.
Trade-off:
Lower value (e.g., 5000ms): New exploration shows on map faster, but more disk reads
Higher value (e.g., 60000ms): Fewer disk reads, but newly explored areas take longer to appear
What this means in practice:
Cache Time Disk Reads Map Freshness
5000 (5s) ~12/min per world New chunks visible within 5 seconds
30000 (30s) ~2/min per world New chunks visible within 30 seconds
60000 (1min) ~1/min per world New chunks visible within 1 minute
Example scenario: A player explores a new area. With chunkIndexCacheMs: 30000, the new chunks won't appear on the web map until the cache expires (up to 30 seconds). The tile will show as empty until then.
Note: This only affects newly explored chunks. Already-explored chunks are always visible. The /easywebmap clearcache command clears this cache immediately if needed
Disk Cache & Smart Refresh
The plugin uses a smart caching system to minimize server load:
Disk Cache: Tiles are saved as PNG files to mods/cryptobench_EasyWebMap/tilecache/. These persist across server restarts, so the first visitor after a restart doesn't trigger mass tile generation.
Smart Refresh: Tiles only regenerate when:
The tile is older than tileRefreshIntervalMs (default: 60 seconds), AND
A player is within tileRefreshRadius chunks (default: 5 chunks)
Why this matters:
If no players are nearby, terrain can't have changed, so the cached tile is always valid
This means 99% of tile requests serve instantly from cache with zero server load
Only actively played areas regenerate, and only once per minute at most
Flow:
Request for tile → Memory cache? → Serve instantly ↓ no Disk cache? → Fresh enough? → Serve from disk ↓ no ↓ old Generate new Players nearby? → No: Serve stale (terrain unchanged) ↓ yes Regenerate tile Pre-generation
Use /easywebmap pregenerate <radius> to warm the cache:
Generates tiles in a square around your position
Skips already-cached tiles and unexplored chunks
Runs in background with 50ms delay between tiles to avoid lag
Example: /easywebmap pregenerate 50 generates up to 10,201 tiles
No max limit - use what you need (large values will take time)
Common Use Cases
Public server map - Let players see where everyone is exploring
Website widget - Embed on your server's homepage to show live activity
Stream overlay - Display the map on your Twitch/YouTube stream
Discord bot - Use the API to post player locations or screenshots
Admin tool - Monitor player activity across your server
FAQ
Q: How do I access the map from another computer? Use your server's IP instead of localhost: http://192.168.1.100:8080
Q: How do I embed it on my website? Use an iframe: <iframe src="http://your-server:8080" width="800" height="600"></iframe>
Q: Can I hide certain worlds? Yes, add specific world names to enabledWorlds in config. Empty array shows all.
Q: How do I put it behind a reverse proxy? Point nginx/Apache to port 8080. WebSocket path is /ws.
Q: Why do some areas show as empty on the map? By default, only explored chunks are rendered (renderExploredChunksOnly: true). This prevents server lag and abuse from users scrolling to unexplored areas. Set it to false in config if you want to render all chunks (not recommended for public servers).
Q: Can users abuse the map to lag my server? Not with default settings. The renderExploredChunksOnly option (enabled by default) prevents rendering unexplored chunks, so scrolling around won't trigger chunk generation.
Q: How do I enable HTTPS? Add "enableHttps": true and "domain": "your-domain.com" to your config. The plugin automatically gets a free SSL certificate from Let's Encrypt. See the HTTPS section above for details.
Q: Why isn't my SSL certificate working? Common issues:
Domain doesn't point to your server's IP
Port 80 is blocked by firewall (Let's Encrypt needs this for verification)
Another service is using port 80 Check the server logs for specific error messages.
Q: Do I need to renew the certificate manually? No! The plugin automatically checks daily and renews certificates 30 days before they expire. You never need to touch it.
Q: Can I use my own SSL certificate instead of Let's Encrypt? Currently, only automatic Let's Encrypt certificates are supported. If you need to use your own certificate, put EasyWebMap behind a reverse proxy (nginx/Apache) that handles SSL.
Q: What if Let's Encrypt is down or rate-limited? The plugin will keep serving HTTP normally. It retries certificate requests and logs any errors. Once Let's Encrypt is available again, certificates will be obtained automatically.
Building from Source
mvn clean package cp target/EasyWebMap-1.0.0.jar /path/to/Server/mods/ Requires Java 25+ and Maven 3.8+.
License
MIT - Do whatever you want with it!
Categories
Need a Server?
Run EasyWebMap on a dedicated Hytale server with easy mod management.
Get Hytale HostingFrequently Asked Questions
What is EasyWebMap?
Live web map for Hytale servers. View your world in a browser with real-time player tracking, direction arrows, and click-to-locate. Embed on your website with iframe or build custom tools with the REST API. Uses Hytale's native map rendering.
How do I download EasyWebMap?
You can download EasyWebMap for free from CurseForge. Click the "Download on CurseForge" button on this page to go directly to the download page.
Who created EasyWebMap?
EasyWebMap was created by PhillipJ. The mod has been downloaded 6.9K times.
Is EasyWebMap compatible with Hytale servers?
EasyWebMap is designed for Hytale and can be used on both single-player and multiplayer servers. Check the mod page on CurseForge for specific compatibility information.
How do I install EasyWebMap?
To install EasyWebMap: 1) Download the mod from CurseForge, 2) Place the file in your Hytale mods folder, 3) Restart the game. The mod should load automatically.
Related Qol Mods
View all mods
EyeSpy
DarkhaxDev
Adds a HUD that displays information about what you're looking at!
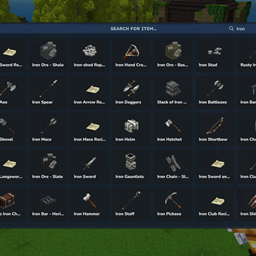
Advanced Item Info
Buuz135
Adds a searchable GUI that displays all the items and the game and displays extra properties they have
Overstacked
DarkhaxDev
Increases the maximum stack size of items.

Violet's Wardrobe
VioletsWorkshop
Adds more customisation options in the form of craftable cosmetics

Item Magnet
Jaredlll08
Adds a magnet that attracts items towards the player.

Endgame & QoL - Boss & Elite Update (3.0.0 in a week)
Lewaii
Endgame & QoL v2.2: Face the Alpha T-Rex & Void Spectres! Unlock Backpack IV & Void Gliders. Restore unused content and challenge stronger, rebalanced bosses!